Rapid Composer 3.8: The Missing Manual
2. Getting Started
2.1 User Interface
Rapid Composer is available for MacOS as well as for Windows (64bit each). The user interface looks almost the same on both systems. The examples, videos and screenshots presented here were created with the Mac version. All key commands presented here also refer to Apple systems. Under Windows there are other combinations due to the missing command key (see Settings > Keyboard Shortcuts).
The Windows version of Rapid Composer can easily be used as a plug-in in other DAWs via VST. AU integration on the Mac is announced, but not yet complete. So far, the program can only be used under MacOS in the standalone version without any further paid utilities (VST-AU wrapper).
(Update: Version 4.0 was released in December 2020. This version finally offers the long awaited AU integration!)
Note:
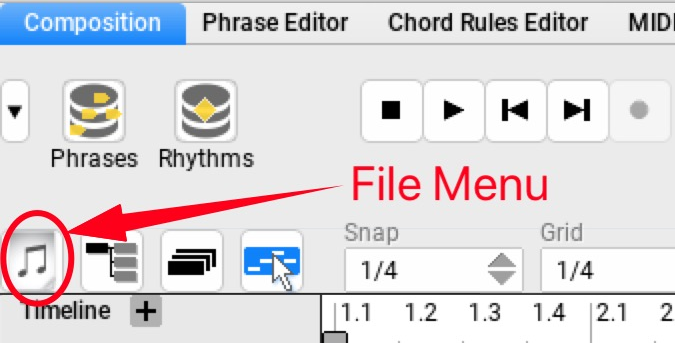
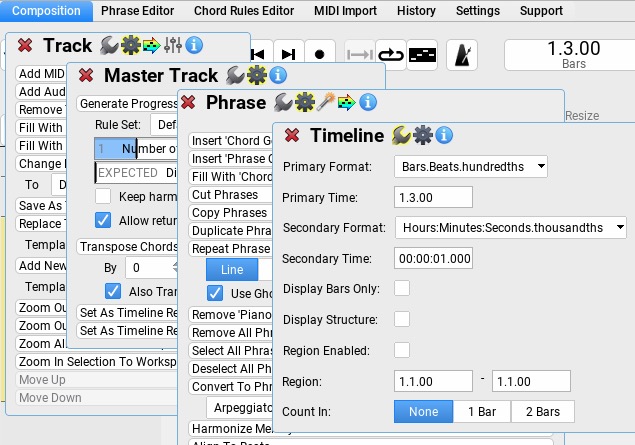
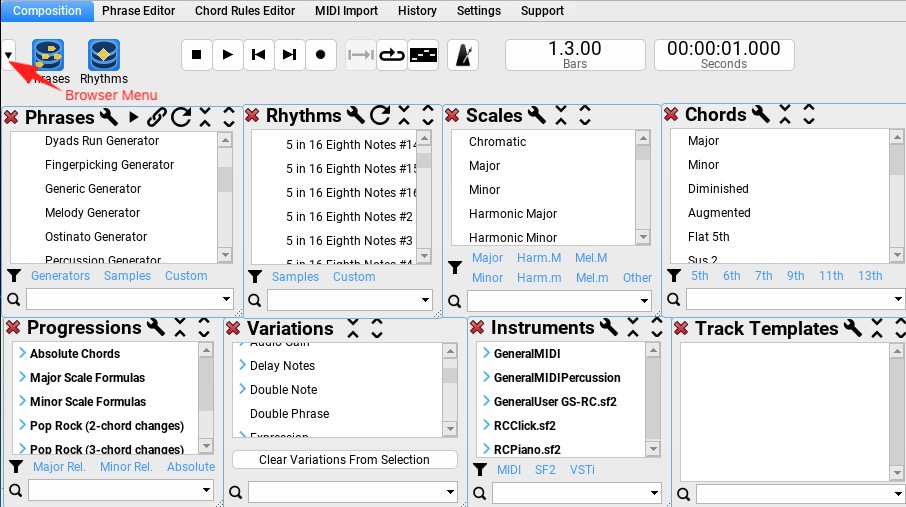
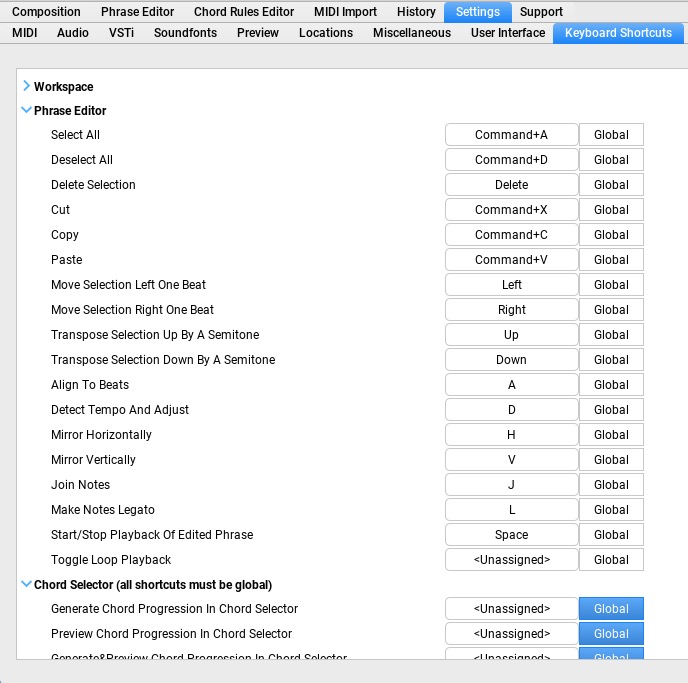
Many important functions are not accessible from menus but only from a number of ▹ non-modal dialog boxes , e.g. via the so calles ▹ Inspectors or ▹ Browsers. In addition, it makes sense to learn a number of important ▹ keyboard shortcuts for particular workflows.
Unfortunately, on the Mac, important mouse or trackpad gestures such as horizontal scrolling or zooming are not supported.
2.2 Selecting a Interface Color Scheme
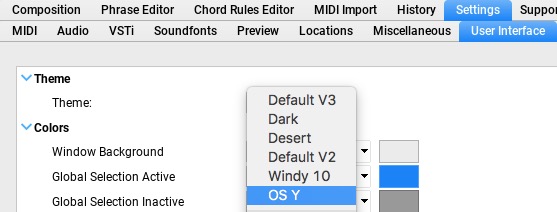
Depending on the display and taste, different coloured interfaces are available under “Settings > User Interface > Theme”. For this tutorial, “▹ OSY” was selected with ▹ two additional color settings (Settings > User Interface > Colors).
In addition to the color options selectable in the program, many more are also available online: ▹ User Interface Themes in the RC-user forum.
2.3 Short Function Test
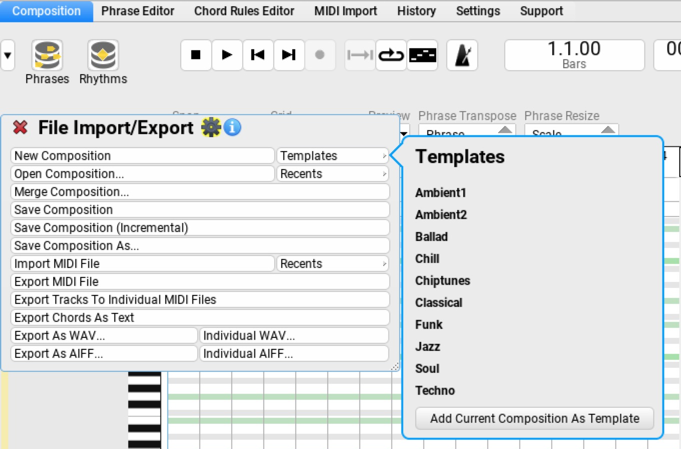
2.3.1 Loading and Playing a Template
- File > Templates > Ballad:
2.3.2 First Impressions
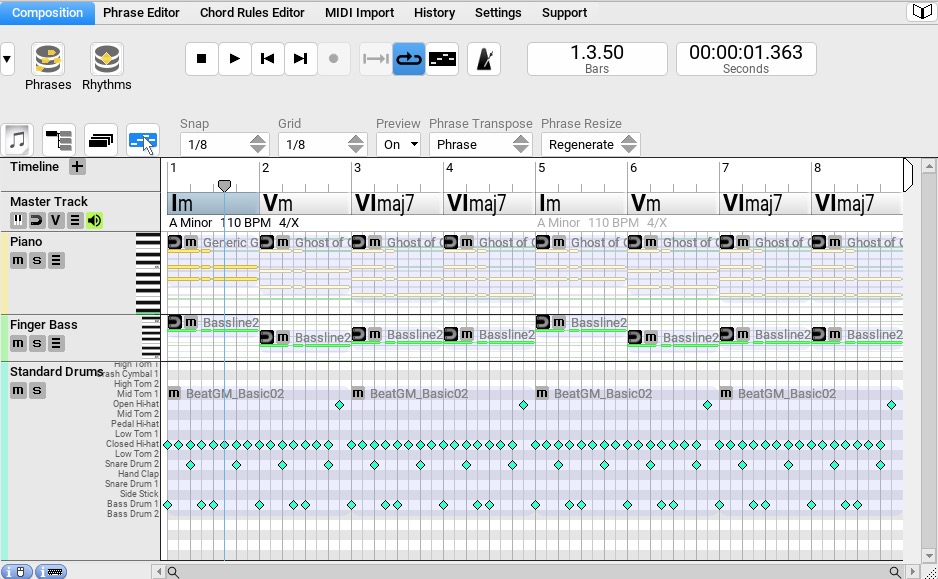
- Start playback (play button in the transport field, alternatively: the space key).
Normally there should be something to hear immediately, since the basic settings are made automatically during installation. If, contrary to expectations, the loudspeakers remain muted, the MIDI settings must be checked again (Settings > MIDI).
At first glance, RC presents itself as a midi sequencer. The various instruments are arranged in a timeline, there are buttons for transport (playback), the MIDI note events are sorted by instrument and displayed in a time grid (piano roll). The chord ruler (master track) is a significant feature that distinguishes the RC from conventional sequencers.
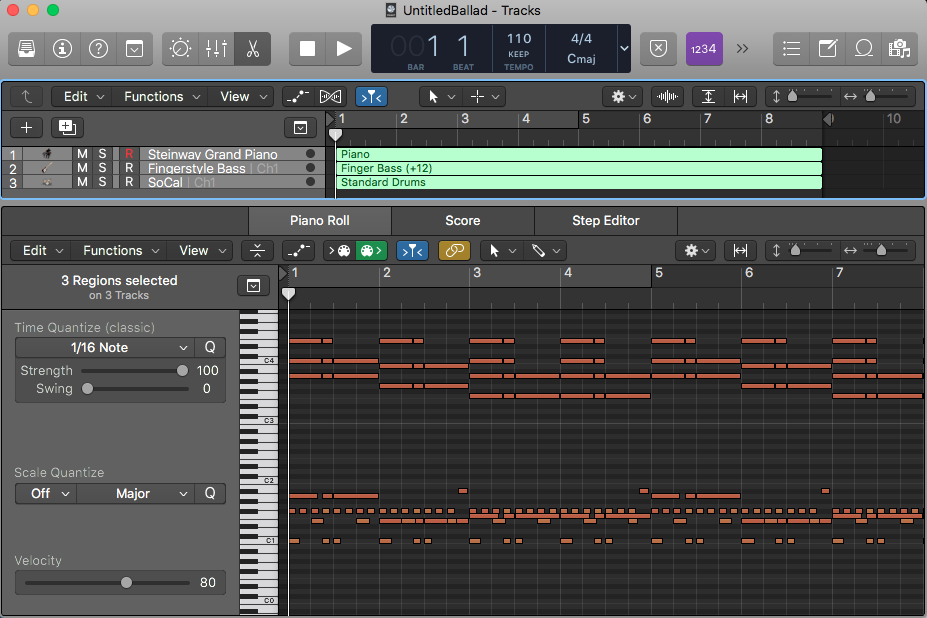
- For comparison: Logic Pro X
2.4 Special Additional Properties of MIDI Note Events in RC
The MIDI note events in a conventional sequencer usually consist of the following individual information:
- Note On
- Note Off
- Note number or name of the note (e.g. C2)
- Volume (Velocity)
This information is visible in the main window of the program in the form of longer and shorter markers (note events) in the time grid. They can be changed with the mouse as desired (add, delete, shorten, cut, etc.).
MIDI note events in RC, on the other hand, have one of the following additional properties (see also Chapter 5):
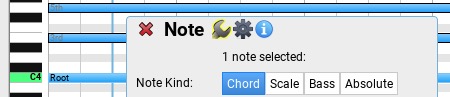
Only the MIDI notes of the type “Absolute Note” remain unchanged as known from conventional MIDI sequencers. The other note types are “relative events” that change dynamically according to the specifications in the master track (see chapter 7).
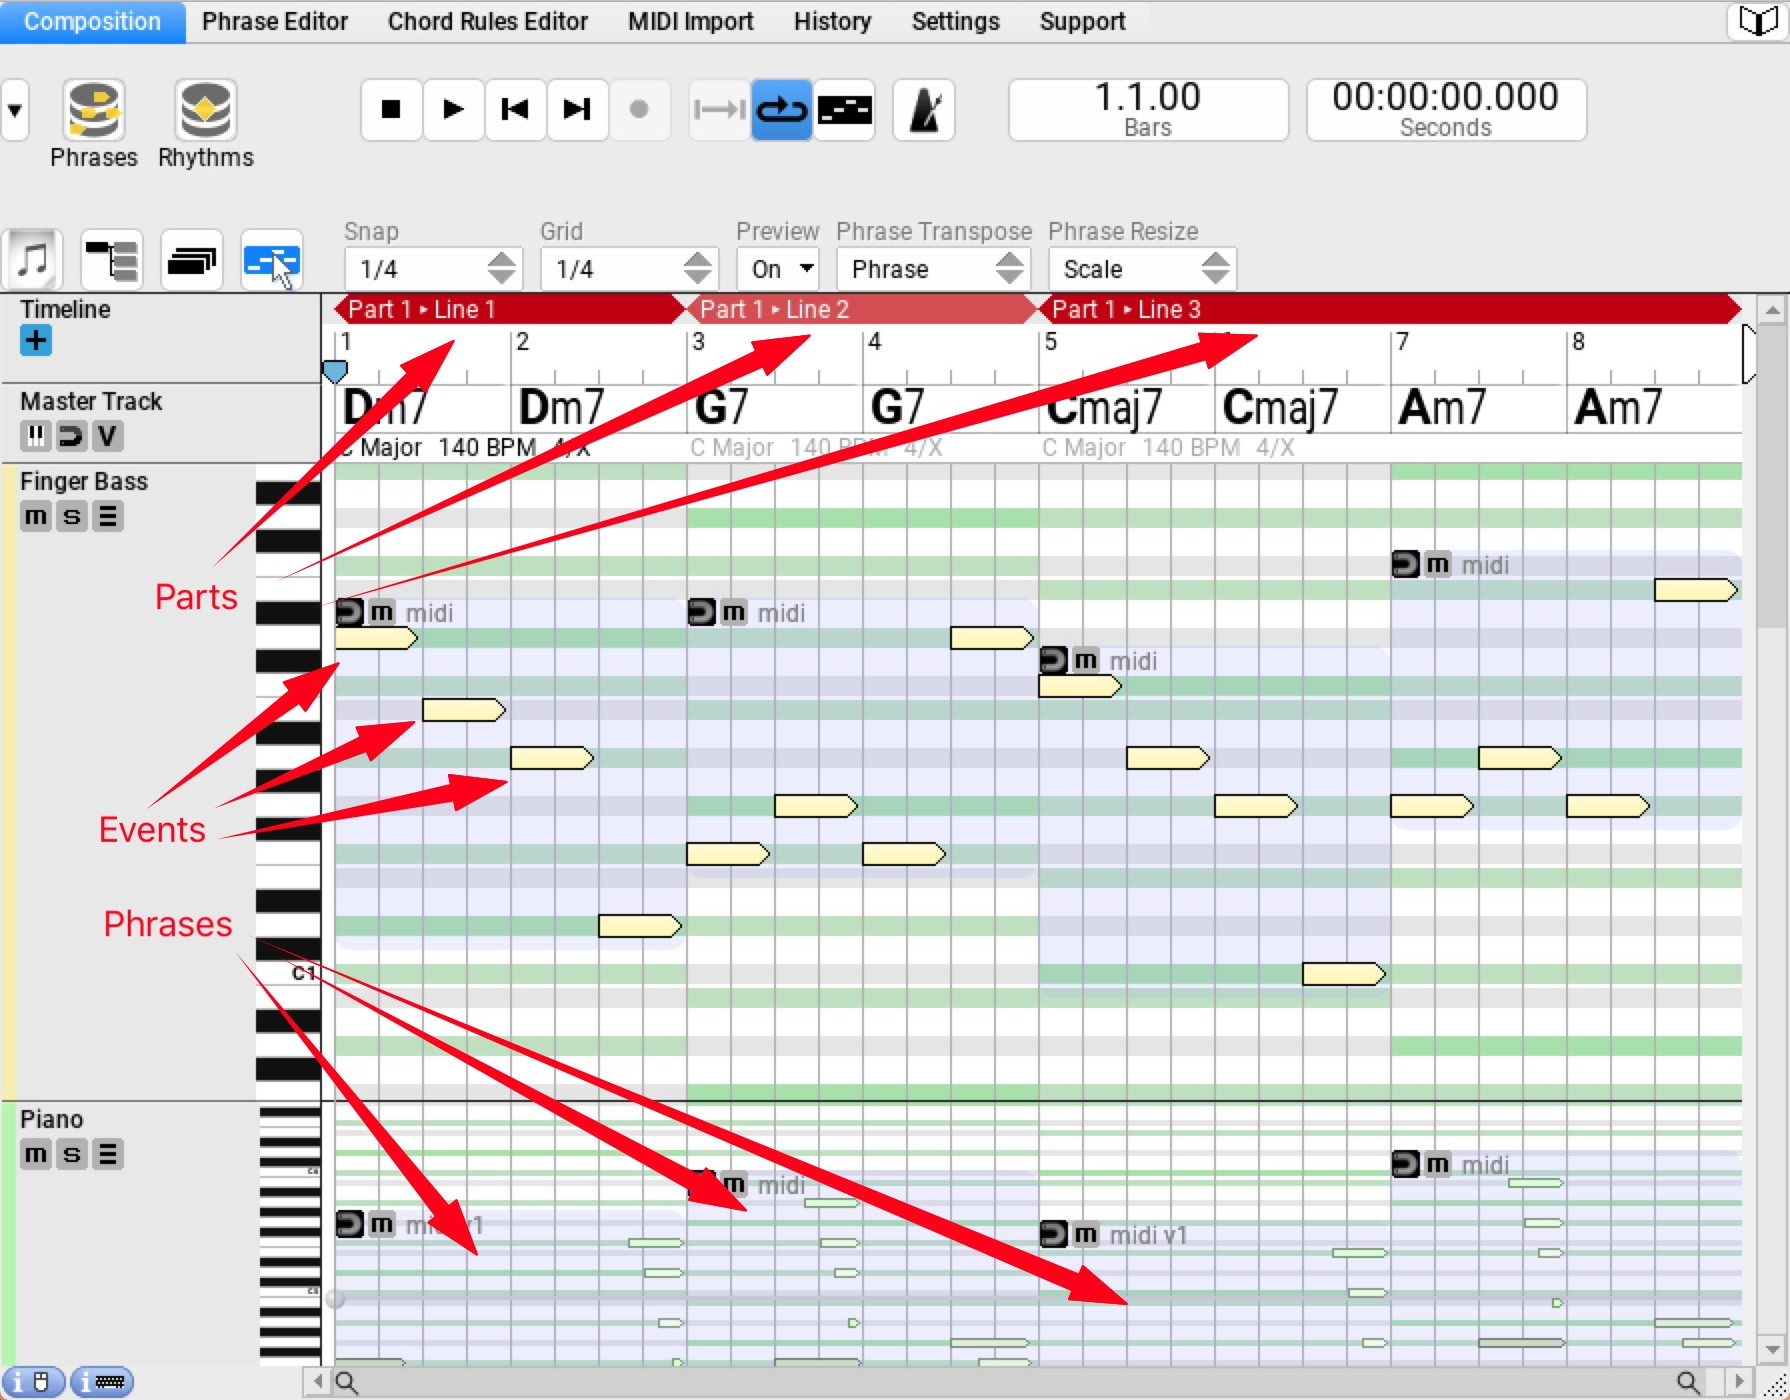
2.5 The Note Event > Phrase > Part > Composition Hierarchy
Separate note events are summarized in a so-called phrase, several phrases are organized in so-called parts (e.g. intro, verse, chorus). Several parts together form a composition at the end.

