Rapid Composer 3.8: The Missing Manual
3. Settings, Chord Experiments
3.1 Settings
After adjusting the following parameters, the examples and illustrations in this tutorial are easier to reproduce.
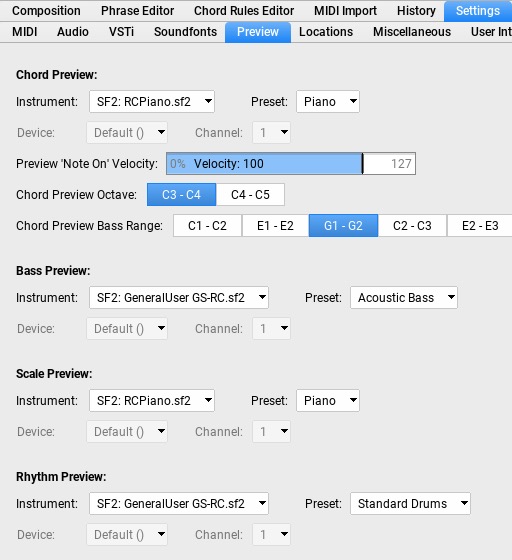
- Chord Preview Instrument: SF2 RCPiano.sf2
- Bass Preview: SF2: GeneralUser GS-RC.sf2, Preset: Acoustic Bass
- Scale Preview (like Chord Preview)
- Rhythm Preview: GeneralUser GS-RC.sf2, Preset: Standard Drums
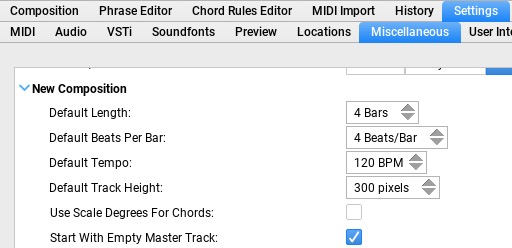
▹ Settings > Miscellaneous > New Composition
- Use Scale Degrees For Chords: Disabled
(Es sollen die Akkordnamen angezeigt werden) - Start with empty master track: Active
(No Progression is loaded)
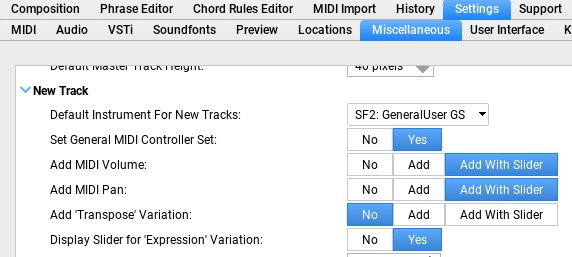
▹ Settings > Miscellaneous > New Track
- Default Instrument for new Tracks: Chord Preview Instrument
- Add MIDI Volume: Slider
- Add MIDI Pan: Slider
- Add MIDI Pan: Slider
- Display Slider for Expression: Yes
- Default Note Shading In Piano Roll: Shade Black Piano Keys
▹ Settings > Miscellaneous > Help
- Show Popup Help: Active
- Popup Help Delay: Short
Settings > Miscellaneous > Editing
- Show ‘History’ For Phrases: Yes
Attention: To save the settings, the program must be quit (e.g. Cmd+Q) and then restarted!
3.2 First Chord Experiments
3.2.1 New Composition
- Composition > File Menü > New Composition

- A new composition opens according to the settings under “Settings > Miscellaneous > New Composition”. It has the length of 4 bars and contains a piano track.
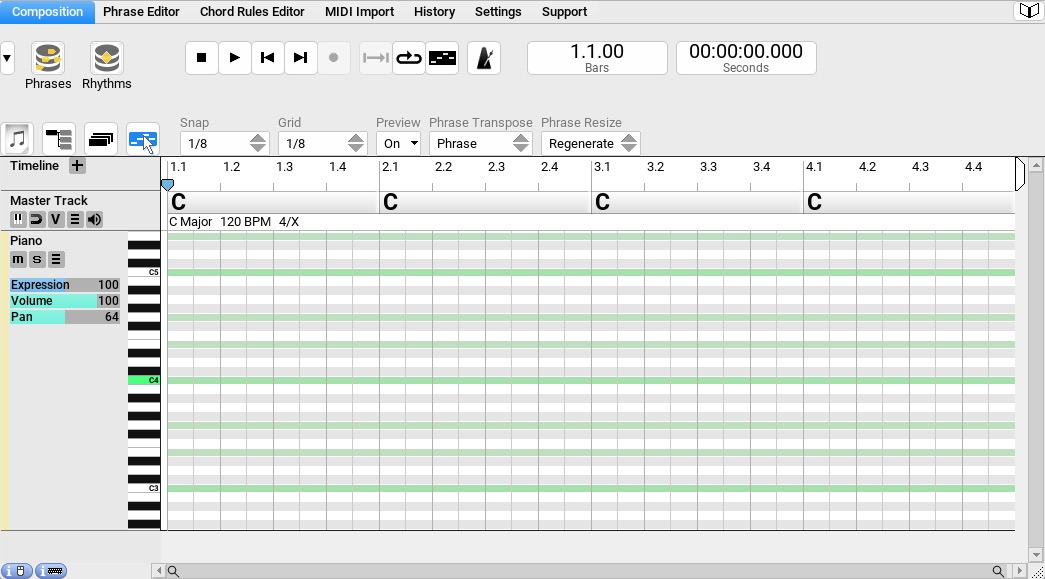
3.2 Timeline
The time flow is visualized by a ruler.
![]()
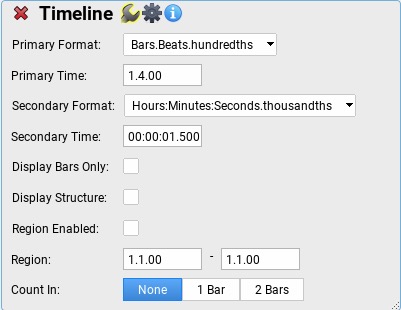
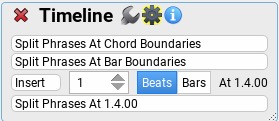
Timeline Inspector
![]()
The Timeline Inspector opens with a right click in the ruler. For first chord experiments only the timeline settings described below are interesting. Timeline actions are not required for the moment.
 |
▹ Timeline-Inspector: Settings
|
 |
▹ Timeline-Inspector: Actions
|
Important keyboard commands (see “Settings > Keyboard Shortcuts > Timeline”)
The Timeline Shortcuts are activated by a single click in the ruler.
| Arrow right/left | Moves the song position line one beat forward or backward |
| Shift+Arrow right/left | Moves the song position line one bar forward or backward |
| + | Insert a beat at the song position |
| 1 | Insert a bar at the song position |
3.2.3 Mastertrack: Short Overview
This is where key, time signature, tempo, chords and various other settings are managed. For the beginning a short insight is enough. More detailed information can be found in chapter 7.
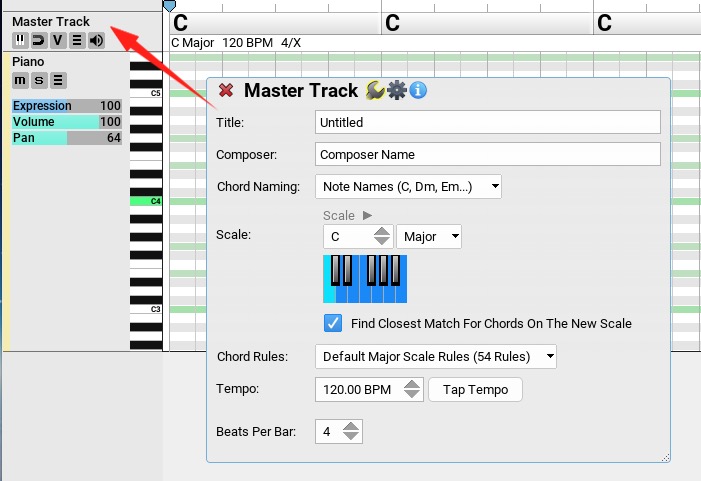
Mastertrack Inspector in several variations
- Attention: The Master Track Inspector does not always offer the same setting parameters. The display depends on where the right click is performed to open the window.
- The Master Track Inspector 1 is opened by right-clicking on the table caption (Track Header Master Track).
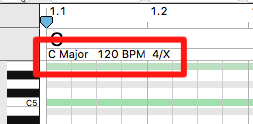
Here are the settings for title, composer, key, chord connection rules, tempo and length. Key, tempo and time signature can also be set by ▹ clicking on the links directly below the first bar.
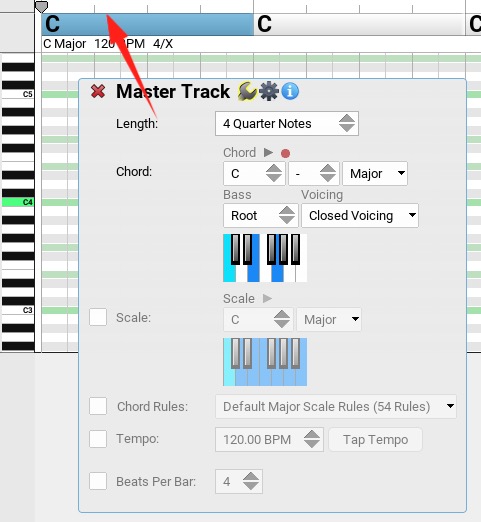
- The Master Track Inspector 2 is opened by right-clicking on a chord segment. The settings made here only apply to the active section in the Timeline.
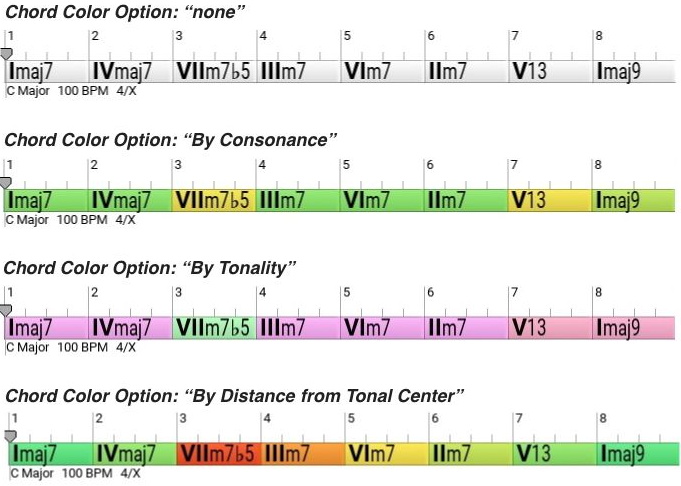
Color Settings and Preview of Chords in the Mastertrack
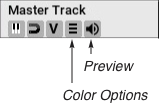 If required, ▹ different color settings are available for the chord segments in the Timeline. For the beginning the function remains unused (Color: None).
“Preview” allows previewing the chords by simply clicking on them in the Timeline. Several options are available. The settings for this are hidden in the Chord Selector (see chapter 7.3.5) under “Options”. “Chord + Bass” is recommended.
3.2.4 Manual Chord Input
The timeline can be loaded with harmonies in many different ways. The simplest and most obvious method is manual input.
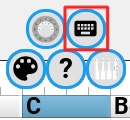
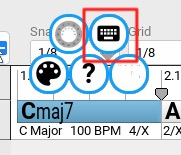
- Click on a chord segment, a selection menu with 5 circles appears
- ▹ Selection of the keyboard icon,
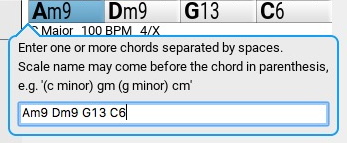
- Entry of the chord ▹ input field for chord symbols.
- Separate ▹ several chord symbols with a blank space.
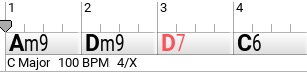
- Chords that are not in the same key ▹ appear in red.
- The pre-listening (active preview function, see above) of the chord connection is done simply by clicking on the segments in the timeline
3.2.5 Creating a Four-Bar Piano Chord Sequence with a Quarter Note Rhythm
Before a chord connection can be played, a track must first be filled with notes or phrases.
- New Composition,
- Select track (click on instrument name)
- Press the “H” key: The track fills up with quarter notes
▹ Video: Automatically Filling the Piano Track With Quarter Notes
The key “H” (Harmonize Track) fills the track with a Chord Generator (see chapter 6.3.2). It can be found in the Phrase Browser (see chapter 6.2). Unfortunately, the default setting “Quarter notes” cannot be changed. If you want to automatically fill the track with chords in a different rhythm, you must first create a corresponding Chord Generator Preset.
3.2.6 Creating a Generator Preset
- New Composition
- Open Phrase Browser
- Get a chord generator on the track
- Right click on the phrase, click on the magic wand in the context menu
- Rhythm: Simple Intervals
- Select “Bar” from the offered rhythms
- At the bottom click on “Save”, type in a name (e.g. “whole note”)
- The whole note generator is stored in the Phrase Browser as a Chord Generator Preset
3.2.7 Creating a Four Bar Piano Chord Sequence (Whole Notes) with a Chord Generator Preset
- New Composition
- Open Phrase Browser
- Generator Presets > Chord Generator
- Click on the previously created preset (whole note)
- Press the “F” key: The track fills up with whole notes.
▹ Video: Filling a track with a Generator Preset (whole notes)
3.2.8 First Experiments with Different Chords in Cycle Mode
- When you click Play, the chord sequence is played. In cycle mode, changes to chords and inversions can be made during operation.
3.2.9 Saving the data
- Compositions are saved as usual via the File Menu
- Settings are saved when you exit the program and only become active when you restart the program.

